Microsoft Authenticator
Set up an authenticator app as a two-step verification method
Set up an authenticator app as a two-step verification method
Important: Before you can add your account, you must download and install the Microsoft Authenticator app. If you haven’t done that yet, follow the steps in the Download and install the app article.
Note: If the Mobile app option is grayed out, it’s possible that your organization doesn’t allow you to use an authentication app for verification. In this case, you’ll need to select another method or contact your administrator for more help.
Set up the Microsoft Authenticator app to send notifications
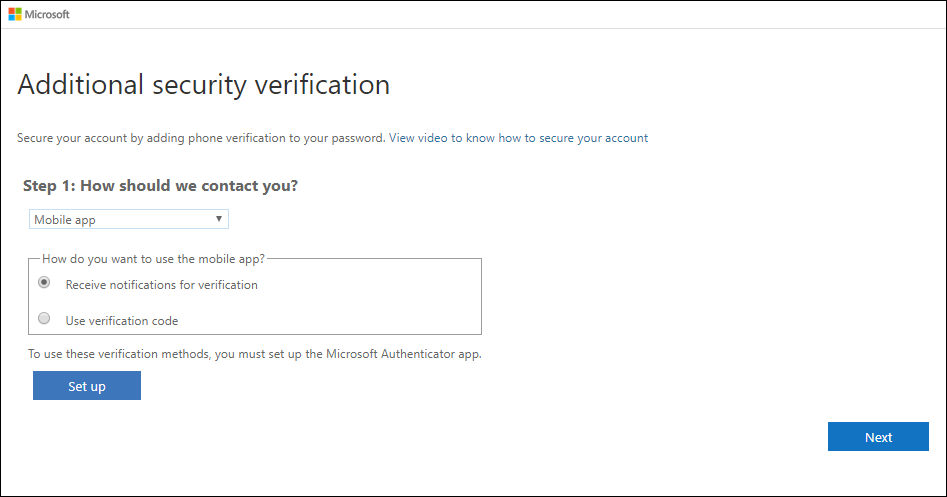
- On the Additional security verification page, select Mobile app from the Step 1: How should we contact you area.
- Select Receive notifications for verification from the How do you want to use the mobile app area, and then select Set up.
The Configure mobile app page appears.

- Open the Microsoft Authenticator app, select Add account from the Customize and control icon in the upper-right, and then select Work or school account.
Note: If you receive a prompt asking whether to allow the app to access your camera (iOS) or to allow the app to take pictures and record video (Android). select Allow so the authenticator app can access your camera to take a picture of the QR code in the next step. If you don’t allow the camera, you can still set up the authenticator app as described in Manually add an account to the app.
- Use your device’s camera to scan the QR code from the Configure mobile app screen on your computer, and then choose Next.
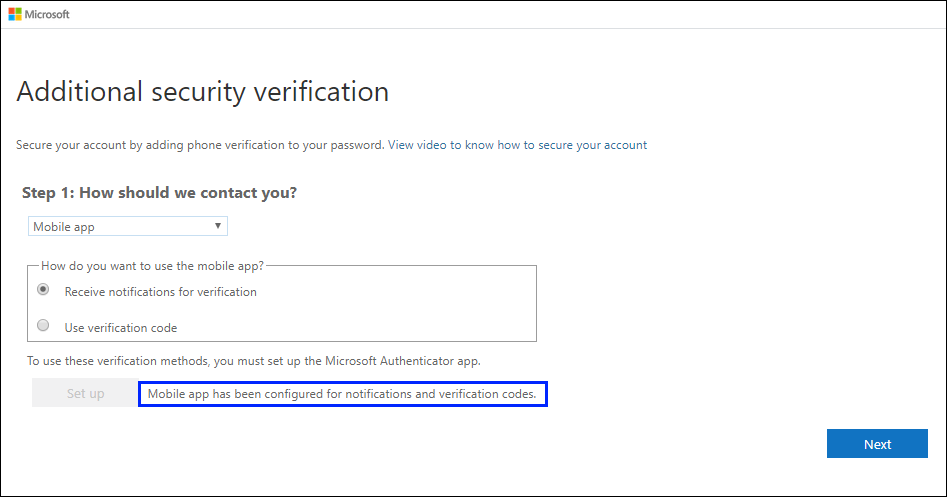
- Return to your computer and the Additional security verification page, make sure you get the message that says your configuration was successful, and then select Next. The authenticator app will send a notification to your mobile device as a test.
- On your mobile device, select Approve.
- On your computer, add your mobile device phone number to the Step 3: In case you lose access to the mobile app area, and then select Next. Microsoft recommends adding your mobile device phone number to act as a backup if you’re unable to access or use the mobile app for any reason.
- From the Step 4: Keep using your existing applications area, copy the provided app password and paste it somewhere safe.
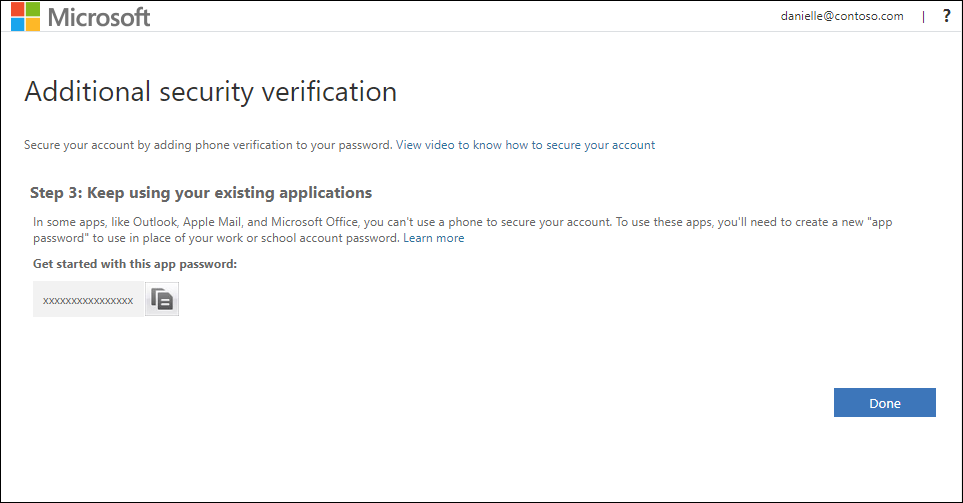
Note: For information about how to use the app password with your older apps, see Manage app passwords. You only need to use app passwords if you’re continuing to use older apps that don’t support two-factor verification.
- Select Done.
Set up the Microsoft Authenticator app to use verification codes
- On the Additional security verification page, select Mobile app from Step 1: How should we contact you?.
- Select Use verification code from the How do you want to use the mobile app area, and then select Set up.
The Configure mobile app page appears.
- Open the Microsoft Authenticator app, select Add account from the Customize and control icon in the upper-right, and then select Work or school account.
Note: If you receive a prompt asking whether to allow the app to access your camera (iOS) or to allow the app to take pictures and record video (Android). select Allow so the authenticator app can access your camera to take a picture of the QR code in the next step. If you don’t allow the camera, you can still set up the authenticator app as described in Manually add an account to the app.
- Use your device’s camera to scan the QR code from the Configure mobile app screen on your computer, and then choose Next.
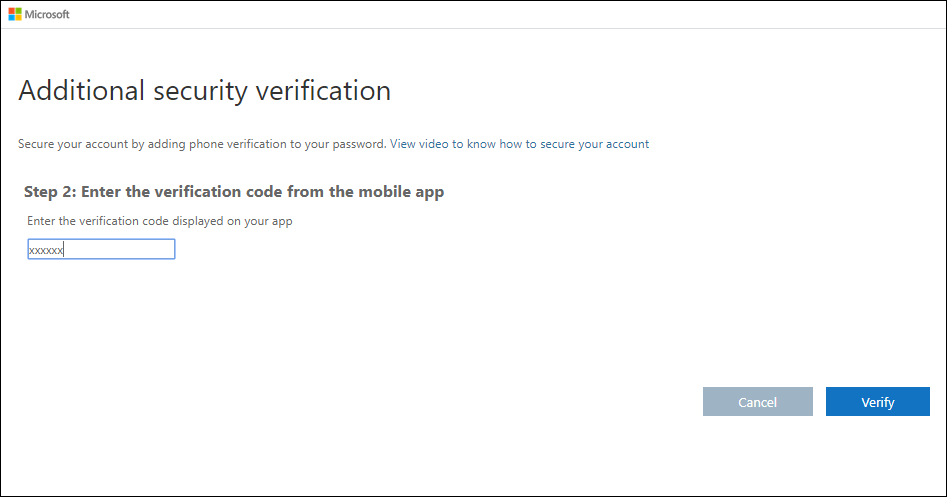
- Return to your computer and the Additional security verification page, make sure you get the message that says your configuration was successful, and then select Next. The authenticator app asks for a verification code as a test.
- From the Microsoft Authenticator app, scroll down to your work or school account, copy and paste the 6-digit code from the app into the Step 2: Enter the verification code from the mobile app box on your computer, and then select Verify.
- On your computer, add your mobile device phone number to the Step 3: In case you lose access to the mobile app area, and then select Next. Microsoft recommends adding your mobile device phone number to act as a backup if you’re unable to access or use the mobile app for any reason.
- From the Step 4: Keep using your existing applications area, copy the provided app password and paste it somewhere safe.
Note: For information about how to use the app password with your older apps, see Manage app passwords. You only need to use app passwords if you’re continuing to use older apps that don’t support two-factor verification.
- Select Done.